
802.11ac Packet-Analysis Finally Arrives!
At Wireless Tech Field Day 5 – we were privileged to be hosted by our friends at WildPackets. A year ago, we saw some of the first inklings of 802.11ac – the ideas on how to decode these new type frames were discussed, but the hardware that would allow this from a USB device wasn’t yet on the market.
Today, however, we not only had a demonstration of the first professional-grade packet analysis software doing 802.11ac decodes – but not from linking to an access point, but directly from a small USB 802.11ac Wi-Fi NIC!
Not only were we exposed to a demonstration, but each delegate was given the opportunity to try it themselves, on their own laptops. Since I’m a Mac user, I’ve grown accustom to running a Windows 7 Professional in a Virtual Machine. My software of choice for this is Parallels.
In order to do this feat – of decoding live 802.11ac without using an access point as the capture devices you’ll need a couple of items.
- Licensed copy of WildPacket’s OmniPeek software.
- OmniPeek’s latest code update – this includes the decodes and refreshed screens to include 802.11ac analysis.
- Linksys-Cisco AE6000 USB Wi-Fi NIC. This is using a Ralink chipset.
- A customized driver from WildPackets to help the Wi-Fi NIC go into ‘promiscuous-mode’ to allow it to capture packet traffic from devices other than itself.
- For Macintosh OS X users – you’ll also need to follow the specific driver installation steps listed below.
 The Linksys/Cisco AE6000 is a USB 2.0 single spatial stream 802.11ac Wi-Fi NIC. So it’s not going to be able to give you everything at this point. But it will have the ability to decode 802.11ac or VHT frames. With the custom driver from WildPackets it can be placed in promiscuous mode and work with their packet capture software.
https://www.linksys.com/en-eu/products/adapters/AE6000
Now for the actual processes to get this to work on a Macintosh OS X – running Windows 7 Professional in a Parallels virtual machine.
- Open Parallels Windows 7 virtual machine
- Install WildPacket’s OmniPeek – including entering your registration information

- Insert Linksys AE6000 USB Wi-Fi NIC in your laptop
- Be sure to have Parallels assign this device to the Windows environment
- Go to Control Panel à Device Manager à Linksys AE6000
- Right Click on the icon for AE6000 that is currently unassigned as to device type (since no drivers have yet been loaded for it)
- Choose Update Driver Software
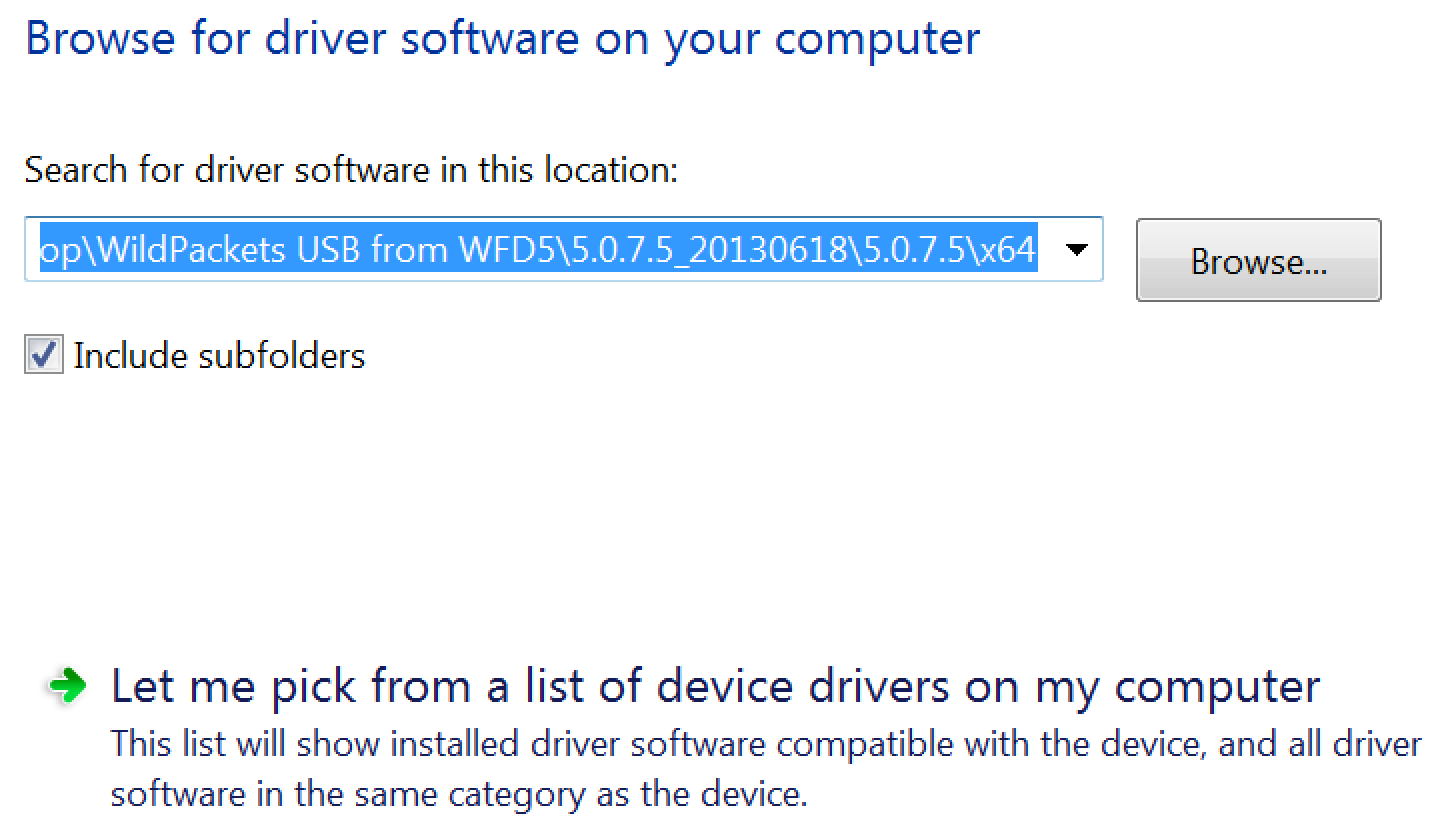
- Choose Browse My Computer for driver software

- Choose Let me pick from a list of device drivers on my computer

- Do NOT allow the update driver software to try and install this automatically, you’re going to have to use this ‘I have a disk’ technique from Windows 98… I know, it’s quite old, but it still will work in this situation.
- Scroll down and select Ralink Technology, Inc. on the left
- Then scroll in the right side to the bottom of the list and choose WildPackets Wireless Adapter

- Click Have Disk
- Browse to the location of the new custom driver for the Linksys AE6000
- This should be at least version 5.0.7.5 of the custom WildPackets driver
- Wait while the driver is installed
- You should now see a WildPackets Wireless Adapter icon under Network Adapters in your Device Manager

- Open WildPackets OmniPeek
- Open a new capture and choose the new adapter you just installed

- Set the 802.11 channel to a 5GHz frame on a channel where 802.11ac exists
- Start capturing 802.11ac Frames!


I know this seems like a long detailed process – but its really quite simple – the only real trick is to use the older-style way to do the ‘Have Disk’ option for driver installation. (Thanks to my friend Sam Clements for helping with this trick – you can find more from Sam at http://sc-wifi.com or on Twitter as @Samuel_Clements)
You too can now capture and decode 802.11ac frames directly on your laptop using a USB Wi-Fi NIC.
Thanks to the team at WildPackets for our session today, and especially to Jay Botelho for his expertise in packet analysis.
