

NetAlly has a couple of choices available to someone looking to add one of their hand-held tools for troubleshooting Wi-Fi. All three are built on an Android platform, charge and sync over a USB-C cable, and also have a Wi-Fi client to join a wireless network for management and sharing data to the NetAlly Link-Live cloud.
The trio of devices all share a common set of tools, apps, and capabilities. But as you move up the stack you add more functionality and features.
AirCheck G3 – EtherScope nXG, CyberScope
First up is the AirCheck G3, a device targeted at those needing only the Wi-Fi tools. Next would be the EtherScope nXG, which adds Ethernet, Copper and Fiber testing and other LAN tests. Including my favorite for validating already installed cables to see if they can carry more than a standard Gigabit… called LANBERT.
And finally, you may opt for the NetAlly CyberScope. This has all the features of the AirCheck G3, as well as all the features of the EtherScope nXG – then adds cybersecurity features on top.
They can all use one of the NetAlly accessories – like a direction antenna, a 2.4GHz/5GHz spectrum analyzer, or the iPerf testing endpoint called the Test Accessory.
AirCheck G3 & LinkSprinter
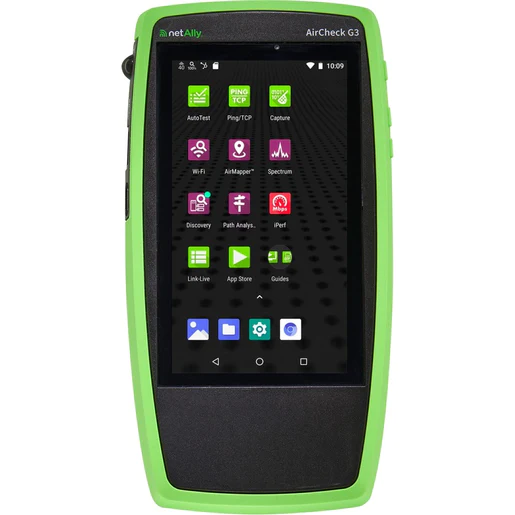
Some of you might be familiar with the older AirCheck G2. It was NOT Android based and did have both Ethernet and Wireless testing. The new AirCheck G3 is much lighter, thinner, and sports the Android interface for compatibility with the other in the NetAlly handheld testing suite… but it does lack for the old Ethernet port.
But don’t worry – for those times you may find yourself on-site and needing the Ethernet/cable testing that was built-in the AirCheck G2 – you only need to couple the AirCheck G3 with the small, almost tiny, Ethernet testing device called the NetAlly LinkSprinter.

The LinkSprinter doesn’t have an interface, but instead uses your phone or tablet as the interface via a Wi-Fi connection and uses that same connection to upload its collected data to LinkLive.
I’ve found a LinkSprinter to be a wonderful tool to give/teach your cable installers to use. First, I’d like the cable installers to test and validate any cable BEFORE ever attaching an access point. It is amazing how many potential ‘troubles with Wi-Fi’ can be solved proactively by assuring the cable, and all layers 1,2, and 3 are performing as required BEFORE the access points get installed.
Note: If you opt for either the EtherScope nXG or CyberScope and are performing only Wireless work… you can really extend the battery life of those higher end devices by turning off the wired ports.
Wi-Fi Troubleshooting
All three devices have a tri-band radio to be able to work with 2.4GHz, 5GHz, and 6GHz bands. I like that NetAlly has ‘tagged’ the channels used in the 6GHz bands with an ‘E’… to designate the separate from other 2.4GHz or 5GHz channels with the same numbering.
These Wi-Fi troubleshooting tools contain all the information you might want. A channel map that is visual – as well as the ability to sort and dive deeper into Channels, SSIDs, APs, BSSIDs, Wi-Fi Clients, and even Bluetooth!
When you drill down even further, there are graphics, statistics, and over-time charts showing details like Signal, Noise, SNR, Channel Utilization, and even the difference between 802.11 and non-802.11 noise. Of course, there are also the sometimes forgotten statistics about Rx and Tx rates – over time… as well as Retry rates. Not only do these show as graphs over time, but additionally the current statistic, Min/Max/Average as well.
I personally like starting my Wi-Fi troubleshooting with a very wide view of the entire RF spectrum(s). Then see where there might be an issue, and drill down to channel, then to the problem SSID, and finally to the individual clients that may be having the issues.
NetAlly tools, all three of these hand-held Wi-Fi troubleshooting devices support and even encourage this type of troubleshooting and analysis.
On-Site Validation – AirMapper
In addition to the Wi-Fi troubleshooting application and data sets, these three devices can also be used to perform an on-site Validation Survey.

NetAlly AirMapper allows the hand-held device to act as a client and collect data from the Tri-band wireless NIC… this data is collected by the device… but a human is needed to add one critical piece of information. That is WHERE the device was during the collection.
The setup includes importing a floor plan, calibrating the floor plan so the system knows the size of the areas being validated. These steps can be done by someone not on site. Perhaps some Wi-Fi engineer back at the home office and then uploads those projects and floorplans into the NetAlly handheld device.
The onsite technician can then open the project and walk around and do the clicking and walking. All the data is shared up via the NetAlly LinkLive cloud and then analysis can take place by those Wi-Fi folks who need to see if the onsite Wi-Fi meets requirements.
Spectrum Analysis
With the addition of a USB Dongle, these devices can also collect and record spectrum analysis in the 2.4GHz and 5GHz bands.
Packet Capture
The AirCheck G3 can capture Wi-Fi packets, and the other two can capture on either the Wi-Fi or the Ethernet ports. These packet captures can then be shared as standard pcap files and reviewed and analyzed in tools like WireShark.
All three tools can capture on 2.4GH, 5GHz, and even 6GHz! After configuring the device to listen on a specific channel and channel width, the frame collection can be shown graphically as well as one of my favorites… showing Control vs Management vs Data frames.
Note: I think you can do a TON of troubleshooting just by understanding the 802.11 protocol and seeing the rations of CTRL/MGMT/DATA on a channel.
AutoTest
Like the other apps, the AutoTest on the AirCheck G3 is only for Wi-Fi. But the EtherScope nXG and CyberScope can perform different automatic test routines on either the Wi-Fi or Wired ports.

For AutoTest – you configure a profile and tests. In the case of Wi-Fi, you’d set the SSID, PSK, what channels to use, how to access DHCP, DNS, and Gateways. As well as the ability to setup specific test targets, like Google, Microsoft, or a specific Wireless LAN Controller address and port.
Once configured, then end technician merely needs to click a single Start button and the suite of tests are run, analyzed, and then uploaded to LinkLive. The onsite person with the device may also review the results. But additionally, all those with access and rights to see the LinkLive results can review those AutoTest results.
Performance Testing
There are also Ping, TCPping, and iPerf test suites that can be used to test performance over the tested network.
Conclusion
How to choose… Tough call. I like all three devices and enjoy using them to solve different sets of issues.
If you ONLY need the Wireless side – the NetAlly AirCheck G3 is a great choice. If you additionally, sometimes, need Ethernet testing, add a small LinkSprinter to your toolkit.
If you need to also test copper or fiber connections or want to add more discovery across your wired infrastructure – then look for the NetAlly EtherScope nXG. (This is also great for doing cable testing… sometimes you need to test Layer1 as well as upper layers!)
Remember either the EtherScope nXG or the CyberScope are SUPERSETS of the AirCheck G3 – think of them as additive.
If, in addition to the Wireless Infrastructure, and the Wired infrastructure, you are also responsible for the cybersecurity of your organization – you might want to invest in the additional cybersecurity features included in the CyberScope.
All three are great choices – you need to decide what types of troubleshooting and testing are required in your work. (Either for your own company’s network, or for those you may consult for)
Note: The LANBERT feature requires either an EtherScope nXG and/or a CyberScope on both ends of the cables you are testing.
I don’t think you can go wrong with any of the choices in handheld network devices from NetAlly!
More Blogs
In future blogs we will dive into some of the tips and techniques used with the tools and apps shared across all three of these devices.